
DIY Photo Blocks – Faux Canvas Photo
I have been seeing these DIY photo canvases all over the net, and well – the photographer in me says “NO Just order a canvas and be done with it” , While the crafty me says “you HAVE TO try this!” My crafty side won.
Here is my first attempt at photo blocking. (aka FAUX CANVAS PHOTO) It may not be done on canvas, but I can tell you, If I made a canvas tutorial, it would be done the same way.
First off let me begin by saying, I have seen tutorials and DIY blogs that tell you that you MUST use a laser printer, and/or you MUST use a purchased print of your photograph. I’m here to tell you that neither of these are true. I created mine using my inkjet printer and Matte Presentation paper. ( HP 32lb premium presentation matte) You will want to buy the paper type that matches your printer. I have an HP printer, therefore I use HP paper.
ONWARD!… What you need:
- Photoshop (or image editing software to size your images)
- Printer
- Matte Presentation paper
- Roller – you can buy a roller or use a thick wooden dowel like I used here.
- Mod Podge (I use Matte, but glossy will work as well)
- Wood Blocks (I used scrap pine that my husband had laying in the garage)
- Foam brush
- Stippling or hard bristle paint brush
- Acrylic paint – your choice of color
- Scissors or cutting board
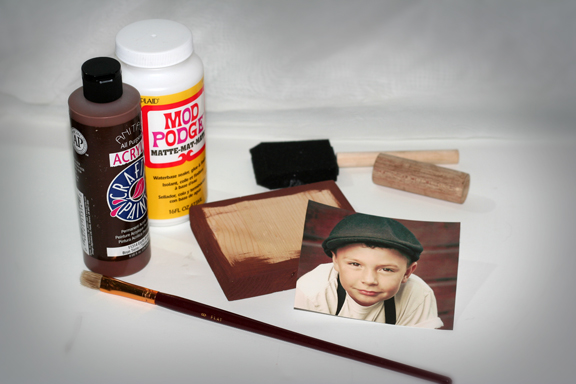

It looks like a large list, but if you are a crafty person, you probably have most if not all of this stuff laying around the house anyway. In the image above I had already prepare my image – sized, printed and cut out. The wood block was painted with the acrylic paint. I did paint the backside all the same color, but the side that the image is going onto doesn’t have to be painted fully. Just be sure you get all the edges.
Apply the Mod Podge to your board. you don’t have to make this thick, just enough to make sure the image will stick all the way around.

Starting at one corner, press your image onto the board and Mod Podge layer. Gently use your finger from middle to edges to push out air bubbles. Use your roller as shown below to push out any extra air bubbles and to really make the edges lay flat. (If you don’t have a roller, a great alternative would be either a rolling pin or a hard plastic cup.

Once this is done, let it dry completely. With Mod Podge, it doesn’t take that long. Using a hair dryer speeds it up tremendously. you can also check on extra air bubbles and push those out while you wait.
Now you are going to take your acrylic paint and stipple a bit of paint around the picture edge. How far onto the picture you go is up to you, but it really is a great way to hide any uneven cuts or hard picture edges.

The stippled paint you just put on has to dry completely. I don’t suppose you want a glue/paint streak across your image? meh, didn’t think so 😛
Once dry you can add the first coat of Mod Podge to the top of the image. How many coats you put here is up to you. I like to do two coats. The first coat I put on I make the streaks go all one way, the second coat I make the streaks go the opposite way. (let them dry in between coats!) This gives it a crisscrossed canvas-like texture that I absolutely adore! I see so many times that some people like to try and get it all smooth and shiny…WHY? Texture is the way to go baby!

Yes, the Mod Podge goes on white, but I promise it dries clear!!
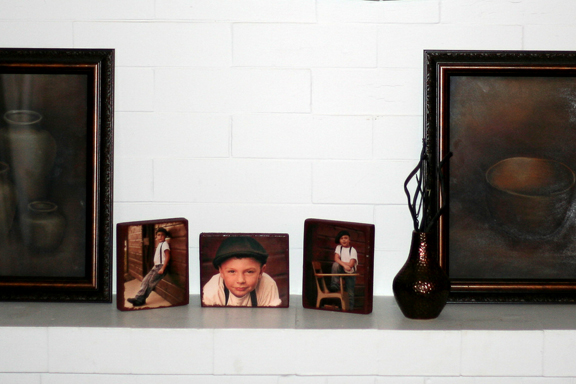
The finished product…My pictures do NOT do these little bad boys justice! I made these ones for my sister…She loved them!
I hope you enjoy your next Photo project 😉
Until next time………..
If you are a photographer or just like to play around with your images in photoshop etc…Visit my webpage, you may find something you like! Link Below:
https://www.steelewizardcreation.com
or visit us on Etsy: https://www.etsy.com/shop/SteeleWizardCreation

